Assignment-Ready Rural Recipes: Locum-Tested Meals from the Field
Whether you’re heating a packet of potatoes or trading a T-shirt for halibut, food on remote assignments becomes part of the story. We asked our providers—many of whom work in some of the most remote regions of Alaska—to share their favorite field-tested meals: what they pack, how they adapt, and the small comforts that make life on assignment feel a little more like home.
From skillet staples to functional fermentation (bacteria never tasted so good!), these are the dishes—and the tricks—that keep them going. While most of these recipes were designed for rural Alaska, they can be adapted for nearly any environment. And if you’ve ever had to bring your own groceries to get through the week, the packing and prep tips here might be just what you’re looking for.
We hope this roundup not only inspires your next meal, but also makes your next grocery run a little easier—and a lot more strategic. Enjoy!
Table of Contents
- Savory Staples
- Cabin Comfort Pie (from Keils K.)
- Halibut Mac Hack (inspired by Josh R.)
- MRE Moose & More Bowl (from Diane R.)
- Pack-In Power Bowl (from Josh R.)
- Saucy Skillet Goulash (from Cindy S.)
- Slow-Simmer Spicy Stew (from Linda B.)
- Snowed-In Sweet Potato Stew (from Colleen K.)
- Trailside Chicken & Rice (from Michael M.)
- Sweet & Snackable
- Trail Cooking Tips & Tricks
Savory Staples
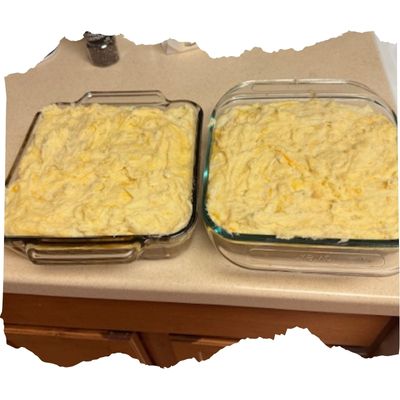
Cabin Comfort Pie (from Keils K., PA)

A hearty, make-ahead casserole with ground moose or caribou—perfect for feeding yourself for days in the field.
About This Recipe
Keils K. adapted this dish from traditional Shepherd’s and Cottage Pies, using ground moose or caribou from his own Alaskan hunts. It’s comfort food at its finest—filling, flavorful, and ideal for freezing ahead of time to bake later on assignment.
“Shepherd’s Pie is made with lamb or mutton. Cottage Pie uses ground beef. Cabin Pie? That’s ground moose or caribou.” – Keils K.
Makes: 4–6 servings
Time: ~1 hour + baking time
Difficulty: Moderate
Ingredients
- 2 Tbsp oil
- 1 cup chopped onion
- 1 lb ground moose, caribou, or lean ground beef
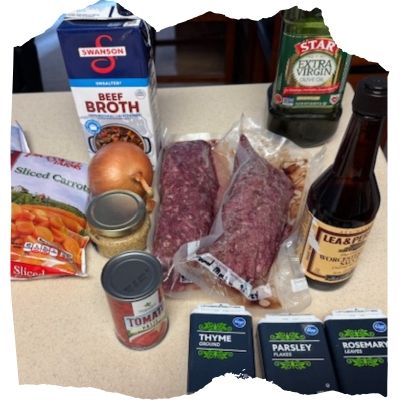
- 2 tsp dried parsley
- 2 tsp dried rosemary
- 2 tsp dried thyme
- ½ tsp salt
- ½ tsp ground black pepper
- 2 Tbsp Worcestershire sauce
- 2 garlic cloves, minced
- 2 Tbsp flour
- 2 Tbsp tomato paste
- 1 cup beef broth
- 12 oz frozen peas and carrots
- 1½ lbs russet potatoes, peeled and cubed
- 6 Tbsp butter
- ⅓ cup Half & Half
- 1 tsp garlic powder
- ½ tsp salt
- ½ tsp ground black pepper
- ¼ cup grated parmesan cheese
- ¼ cup grated cheddar cheese
Instructions

Keils in the Kitchen
- Make the Meat Filling:
- Heat oil in a large skillet. Add onions; cook 5 minutes.
- Add meat, parsley, rosemary, thyme, salt, and pepper. Cook until browned (6–8 minutes).
- Stir in Worcestershire sauce and garlic; cook 1–2 minutes.
- Add flour and tomato paste; stir well to combine.
- Add broth and frozen veggies. Bring to a boil, then simmer for 5 minutes. Set aside.
- Make the Potato Topping:
- Boil potatoes in salted water until fork-tender (10–15 minutes). Or, cook instant potatoes according to package directions.
- Drain and return to pot briefly to dry.
- Mash with butter, Half & Half, garlic powder, salt, and pepper.
- Stir in parmesan and cheddar.
- Assemble & Bake:Pour meat filling into a 9×9 inch baking dish.
- Top evenly with mashed potatoes.
- Bake at 400°F for 25–30 minutes until golden and bubbling.
- Let cool 10–15 minutes before serving.
Field Notes
- Assemble the pie at home and freeze—wrapped well—for easy baking later on assignment.
- Works with lean ground beef, venison, or other game meats.
- Boxed mashed potatoes work in a pinch—just add garlic powder and cheese.
- Any frozen vegetable mix will do, but peas and carrots are classic.
Halibut Mac Hack (inspired by Josh R., NP)
A warm, simple dish built from pantry staples—with a nod to Kodiak hospitality.
About This Recipe
Josh R. may not have one specific go-to recipe, but one of his most memorable meals came from a spontaneous trade: one T-shirt for a slab of fresh halibut. Inspired by the ingredients he typically packs and the spirit of sharing in remote Alaska, this dish is part pantry-staple, part local magic.
“I bring what I can’t get, and trade when I can.” – Josh R.
Makes: 1–2 servings
Time: ~20 minutes
Difficulty: Easy
Ingredients
- 1 serving boxed mac & cheese
- 1 filet of halibut or other local/available fish (fresh or frozen)
- 1–2 tbsp oil or butter for cooking
- Salt, pepper, and any spices you packed (paprika, lemon pepper, garlic, etc.)
- Optional: frozen or canned veggies from your stash
- Optional: Extra cheese, butter, or cream for the mac
Instructions
- Cook the base:
- Make your mac & cheese according to the box instructions
- Embellish with extra cheese, butter, etc. if available
- Cook the halibut:
- Season the halibut with salt, pepper, and your favorite packed spices
- Sear in a hot pan with oil or butter until golden and cooked through (about 3–4 minutes per side depending on thickness)
- Assemble your bowl:
- Add halibut on top of mac & cheese
- Toss in a handful of veggies if you have them
- Finish with extra seasoning or a squeeze of lemon if available
Field Notes
- This meal is all about adaptability. Whether you’re working with a fresh catch, a gifted filet, or something from your freezer, it’s a reminder that the best meals aren’t always fancy—they’re built from whatever you have… and who you’re with.
MRE Moose & More Bowl (from Diane R., PA)
A humble MRE transformed with a little creativity and a lot of local heart.
About This Recipe
Thriving in the field, Diane R. has found a smart workaround for remote food prep: bulk MREs, enhanced with foraged and gifted local ingredients. From dried staples like rice and beans to wild berries and moose meat, each meal becomes an opportunity to connect with locals—and trade like one, too.
“The moment I learned to trade food, I felt like a local.” – Diane R.
Makes: 1–2 servings
Time: ~15 minutes
Difficulty: Easy
Ingredients
- 1 serving of instant rice or beans (from MRE kit)
- Seasoning packet or powdered broth (optional)
Local Add-Ins (as available)
- Cooked moose, reindeer, or salmon (or other locally available meat)
- Fresh or frozen wild berries (cherries, blueberries, salmonberries)
- Foraged greens or sautéed onions (if accessible)
Instructions
- Prepare the base: Cook rice and/or beans per instructions (typically adding boiling water and letting it sit).
- Mix in protein: Stir in small pieces of cooked local meat of choice. Reheat together if needed.
- Top with berries or greens: Add fruit for a sweet-savory mix or veggies for a hearty finish.
- Season to taste: Use MRE-provided packets or any spices you’ve packed along.
Field Notes
- Diane R. often received gifts of food from local patients and coworkers—including salmon, reindeer, moose, and frozen wild cherries.
- Bartering became a natural part of her food experience on assignment, blending practicality with hospitality.
- These exchanges helped Diane feel more connected to the community—and stocked her freezer with uniquely local ingredients.
Pack-In Power Bowl (from Josh R., NP)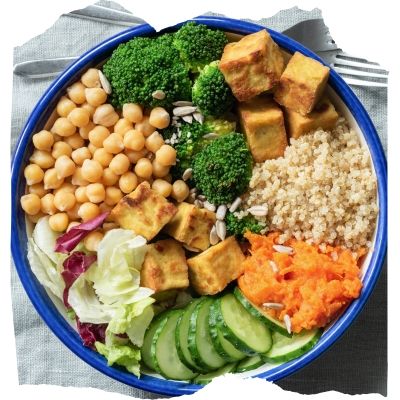
A simple, shelf-stable bowl powered by beans, tofu, and whole grains.
About This Recipe
Josh keeps his meals practical, relying on a few nutrient-dense staples that travel well and store even better. This rice-and-beans combo is endlessly adaptable and gets a protein boost from tofu—plus a handful of frozen veggies if available.
“I bring a lot of dried beans and legumes, tofu, and frozen vegetables if I can.” – Josh R.
Makes: 1–2 servings
Time: ~20 minutes
Difficulty: Easy
Ingredients
- ½ cup cooked rice
- ½–1 cup cooked beans or lentils (any kind)
- ½ block tofu, cubed (shelf-stable or packed in water)
- ½–1 cup frozen or canned vegetables (optional)
- Olive oil, soy sauce, garlic powder, or any seasonings you’ve packed
Instructions
- Cook rice and beans ahead of time or use precooked versions.
- Crumble or chop tofu into nuggets or cubes.
- Sauté tofu in oil until golden, or warm it with the beans and veggies if short on time.
- Assemble your bowl: Add rice, beans, tofu, and veggies to a bowl.
- Season generously with soy sauce, chili flakes, garlic powder, or whatever you’ve got.
Field Notes
- Josh prioritizes lightweight, nutritious foods he can pack-in himself. This bowl is built entirely from items that can be brought in dried or frozen.
Saucy Skillet Goulash (from Cindy S., NP)
A cozy, one-pan pasta dish made with simple staples and a lot of flexibility.
About This Recipe
Cindy S. puts her own spin on goulash—a quick, filling meal that’s easy to pull together with pantry goods and just a few fresh ingredients. This comforting dish comes together in one pan and makes enough for leftovers.
“I brown meat with chopped onion, add canned tomatoes and pasta—and sometimes corn. That’s it!” – Cindy S.
Makes: ~4 servings
Time: ~30 minutes
Difficulty: Easy
Ingredients
- 1 lb ground meat (beef or turkey—or substitute any available ground or chunked meat)
- 1 small onion, chopped (or 1–2 tbsp dehydrated onion)
- 1 can diced tomatoes (with juice)
- 2 cups cooked pasta (macaroni, rigatoni, or your favorite shape)
- 1 cup cooked frozen corn (or any frozen or canned veggie you like—peas, green beans, spinach, etc.)
- Salt, pepper, and seasoning to taste (garlic powder, paprika, or Italian blend all work well)
Instructions
- Brown the meat: In a large skillet or saucepan, cook ground meat with chopped onion (or dehydrated onion) until fully browned. Season as desired.
- Add tomatoes: Stir in the full can of diced tomatoes, including the juice. Let simmer for a few minutes to blend the flavors.
- Mix in pasta: Add your cooked pasta to the pan and stir to combine.
- Add vegetables: Toss in cooked frozen or canned veggies—corn, peas, or whatever you have on hand.
- Taste and serve: Adjust seasoning and enjoy warm!
Field Notes
- Uses canned veggies, corn, or dehydrated onions depending on what’s available.
- Emphasizes adaptability of pasta shapes and proteins.
Slow-Simmer Spicy Stew (from Linda B., NP)
A one-pot wonder that only gets better with time—perfect for chilly field nights and fridge-friendly for leftovers.
About This Recipe
This hearty, spicy, and satisfying soup is a favorite of provider Linda B. It’s simple, filling, and even better the next day. Throw it all in a crock pot, let it simmer, and enjoy it plain or dressed up with all the fixings.
“It sounds crazy, but it’s good!” – Linda B.
Makes: ~8 servings
Time: ~20 min prep, 4–8 hrs in crock pot
Difficulty: Easy (if packing ingredients)
Ingredients
- 3 lbs ground hamburger (or substitute any ground or cubed meat—moose, turkey, sausage, etc.)
- 1 can Rotel (or diced tomatoes with green chiles)
- 1 can black beans (drained)
- 1 can kidney beans (drained)
- 1 can pinto beans (drained)
- 1 can corn kernels (drained)
- 1 can diced tomatoes
- 3 jalapeños, chopped (fresh or canned)
- 1 onion, chopped
- 1 packet taco soup seasoning
- 1 packet ranch seasoning mix
- 1 box (32 oz) chicken broth
Instructions
- Prep the meat: Brown the ground meat in a skillet, drain, and set aside.
- Dump and stir: Add all ingredients to a crock pot—meat, veggies, beans, seasonings, and broth. Stir well.
- Cook low and slow: Cover and cook on low for 6–8 hours or high for 3–4 hours. The longer it simmers, the better the flavor.
- Serve hot: Eat as-is or customize with your favorite toppings.
Field Notes
- Spoon over Fritos or tortilla chips
- Top with shredded cheese, sour cream/unsweetened yogurt, or avocado slices (if available)
- Add a squeeze of lime or a dash of hot sauce for a flavor boost
- Store leftovers in the fridge—it tastes even better the next day
Snowed-In Sweet Potato Stew (from Colleen K., NP)
A hearty vegetarian stew built to warm you up and hold you over on the coldest assignments.
About This Recipe
When the temps drop and you’re tired of chili, this stew delivers. Packed with chickpeas, sweet potatoes, and warming spices, it’s satisfying, meatless, and freezes beautifully—perfect for prepping in bulk and thawing as needed.
“Something a little different for when I’m sick of chili.” – Colleen K.
Makes: ~4–6 servings
Time: ~45 minutes
Difficulty: Easy
Ingredients
- 2 Tbsp olive oil
- 1 onion, chopped
- 5 cloves garlic, grated
- 1 inch fresh ginger, grated
- 1 tsp cumin
- 1 tsp turmeric
- ¼ tsp red pepper flakes
- 2 cans (15 oz each) chickpeas, drained
- 2 cans (15 oz each) diced tomatoes
- 1 cup vegetable broth (or water)
- ~12 oz sweet potato (about 2 medium), peeled and diced
- 1 tsp salt
- Black pepper to taste
- 3 packed cups spinach
Instructions
- Heat olive oil in a heavy pot or Dutch oven. Add onion and sauté for 2–3 minutes.
- Add garlic, ginger, cumin, turmeric, and red pepper flakes. Cook for 1 minute until fragrant.
- Stir in chickpeas to coat in spices.
- Add tomatoes, broth, sweet potatoes, salt, and pepper.
- Cover and bring to a boil, then reduce to simmer for 20–30 minutes until sweet potatoes are fork-tender.
- Stir in spinach until wilted. Adjust salt, pepper, or spice to taste.
- Serve hot—with a dollop of cheese or yogurt if you’d like.
Field Notes
- Colleen cooks this at home, freezes portions flat, and packs them in a soft cooler for travel.
- Fully plant-based, it keeps well and requires no fresh meat or dairy—ideal for remote areas.
- Recommended for when you’re burnt out on chili but still want something hearty and flavorful.
Trailside Chicken & Rice (from Michael M., PA)
A quick, filling meal upgraded with flavor and field-sourced flair.
About This Recipe
Michael M. doesn’t overcomplicate meals during assignments. He keeps things consistent, rotating through a lineup of Mountain House backpacking meals that are easy to prepare and easy to enhance. His strategy? Add flavor and variety with dehydrated veggies, spices, and occasional luxury items like crab or sardines for “special” days.
“Not fantastical—but satisfying, repeatable, and field-tested.” – Michael M.
Makes: 2 large servings
Time: 10 minutes
Difficulty: Very Easy
Base Ingredients
- 1 Mountain House Chicken and Rice Meal (2-serving pouch)
- Boiling water (per pouch instructions)
Upgrade Add-Ins
- 1–2 tbsp dehydrated onion
- 2 tbsp dehydrated bell peppers
- 2 tbsp dehydrated zucchini
- Dash of garlic powder or favorite seasoning blend
Instructions
- Boil water per the meal pouch directions.
- Add vegetables and seasoning to the dry pouch before adding water.
- Pour in boiling water, stir well, and seal the pouch. Let sit 8–10 minutes.
- Stir again and enjoy! Add a scoop of tinned fish or mayo if you’re leveling up that day.
Field Notes
- Michael’s wife preps one-gallon bags of dehydrated veggies and mails them to him on assignment.
- Dry goods are added incrementally to his Mountain House meals throughout the assignment—offering variety without taking up much space.
- Occasional luxury items like canned tuna, crab, or sardines are great for “special” days.
Sweet & Snackable
Becky’s Biscuits (from Becky S., NP)
Flaky, tangy, and field-tested—made with homemade or store-bought Greek yogurt.
About This Recipe
Becky S. makes her biscuits with Greek yogurt instead of buttermilk, which makes them perfect for field assignments where shelf-stable ingredients are key. Whether you make your own yogurt (like Becky often does) or pack some in from town, these biscuits are a cozy staple that bake up beautifully—even in basic kitchens.
Makes: ~10–12 biscuits
Time: ~30 minutes
Difficulty: Moderate (requires some technique)
Ingredients
- 2 cups flour
- 2½ tsp baking powder
- ½ tsp baking soda
- ½ tsp salt
- ¼ cup sugar (white or brown)
- ⅓ cup butter (very cold; grated or chopped)
- 1 cup whole milk plain Greek yogurt (may need a bit more liquid)
Instructions
- Prep dry mix: Sift together flour, baking powder, baking soda, salt, and sugar in a mixing bowl.
- Cut in butter: Use a pastry cutter, grater, or food processor to cut cold butter into the flour until it forms pea-sized crumbs. Tiny butter pieces are key—they’ll melt as the biscuits bake and create flaky layers.
- Add yogurt: Gently stir in the Greek yogurt until the dough holds together. If it feels too dry, add a bit more yogurt or milk.
- Shape: Sprinkle flour on your work surface. Flatten dough to about ¾-inch thick and cut into desired shapes—round is classic, but diamonds are faster!
- Bake: Place biscuits on a baking sheet and bake at 425°F for 12–15 minutes, or until golden.
Field Notes
- Becky recommends grating cold butter for easier mixing—especially helpful if you’re working without a full kitchen setup.
- The butter must be in tiny pieces which will melt as the biscuits bake. That cutting process is the key.
- These biscuits pair great with soup, breakfast, or a dollop of jam.
Bluffside Brownies (from Sarah K., NP)
A bake-anywhere brownie mix boost for when you need something sweet and simple on assignment.
About This Recipe
Sarah K. doesn’t have a single go-to recipe—but when she needs a treat that’s comforting and easy, she turns to boxed brownies. Her strategy? Pick mixes that require few to no fresh ingredients, and bring a few bonus flavors to make them your own.
Makes: 1 standard box (8–12 brownies)
Time: ~30 minutes
Difficulty: Easy
Ingredients
- 1 box brownie mix (look for those that require only oil + water)
- Water and oil, per box instructions
Optional Mix-Ins & Upgrades
- Pinch of cinnamon, cayenne, or instant coffee
- Spoonful of nut butter, yogurt, or shelf-stable cream
- Handful of chocolate chips or chopped nuts (if you brought them)
Instructions
- Prepare boxed brownie mix according to package instructions (ideally, those that don’t require eggs or milk).
- Stir in any optional spices or mix-ins you’ve packed.
- Pour into a baking dish, toaster oven tray, or microwave-safe mug depending on your setup.
- Bake per box directions—or try 90 seconds in the microwave for a small “mug cake” version.
- Cool slightly and enjoy warm.
Field Notes
- When shopping for mixes, Sarah looks for those that only require water and oil—no eggs or milk.
- Vegan or gluten-free mixes are often more shelf-stable and forgiving in remote kitchens.
- These brownies can be made in most staff housing setups—from toaster ovens to microwaves.
- Have a mix that needs eggs? No problem. Try one of these easy egg substitutes:
- ¼ cup applesauce
- 1 mashed banana
- 1 tbsp ground flax + 3 tbsp water (let sit 5 minutes)
Choco-Chill Protein Smoothie (from Colleen K., NP)
A freeze-ahead smoothie that packs chocolatey flavor, greens, and protein into one easy-to-pour trail treat.
About This Recipe
Colleen preps this smoothie in big batches at home and freezes individual servings flat in Ziplock bags. They’re quick to thaw, nutrient-dense, and give her a taste of sweet, fresh fruit, and greens during long stints in remote housing.
“I like to meal prep because then I can cook in the comfort of my own kitchen—and avoid the drought of fresh fruits and vegetables in very remote areas.” – Colleen K.
Makes: ~5 smoothies (1 large blender batch)
Time: ~10 minutes
Difficulty: Easy
Ingredients
- 12 oz oat milk
- 2 heaping scoops chocolate protein powder
- ½ cup Greek yogurt
- ½ cup unsweetened applesauce
- ½ cup frozen pineapple
- 1 cup frozen berry blend (strawberries, blueberries, raspberries)
- ½ frozen banana
- ½ cup frozen spinach/kale blend
Instructions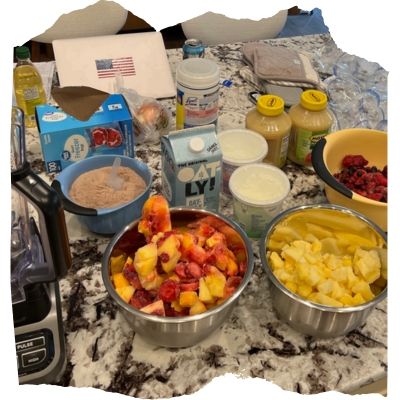
- Combine all ingredients in a high-powered blender (like a Vitamix or Ninja).
- Blend on high until smooth and creamy.
- Pour into 5 Ziplock bags and freeze flat for easy transport and storage.
- To serve, thaw in the refrigerator or at room temperature until pourable.
Field Notes
- These smoothies are ideal for busy mornings or as post-shift recovery fuel.
- Freezing ahead allows you to bring fresh fruits and leafy greens that would otherwise be unavailable on assignment.
- Colleen recommends pairing them with a soft-sided cooler and solid prep-day playlist.
Pack-Lite Peanut Cookies (from Sarah K., NP)
A sweet treat with minimal effort—if you can pack in the goods.
About This Recipe
Sarah K. occasionally whips up these easy, comforting cookies during assignments—but only if she’s able to pack in the ingredients. Peanut butter and sugar can be heavy or expensive depending on where you’re headed, so this one’s a “luxury bake” for when the stars align.
“Ingredients are heavy if you’re bringing them in, and expensive if you’re buying in the village.” – Sarah K., NP
Makes: ~12 cookies
Time: ~15–20 minutes
Difficulty: Easy
Ingredients
- 1 cup peanut butter
- 1 cup sugar
- 1 egg
Instructions (basic guideline—adjust to your field setup)
- Mix all ingredients in a bowl until smooth.
- Scoop spoonfuls onto a baking sheet (or pan if you’re improvising).
- Bake at 350°F for ~10–12 minutes, or until edges are lightly golden. Let cool.
Field Notes
- These cookies are simple—but not always practical. Consider them a treat for when you have a bit more room in your bag… or your budget.
Yukon Yogurt (from Becky S., NP)
A creamy, protein-packed staple made from shelf-stable ingredients—perfect for long assignments in remote locations.
About This Recipe
Fresh dairy products can be hard to come by at remote sites, but with a bit of prep and the right tools, Becky S. creates her own thick, tangy Greek yogurt from dry or ultra-pasteurized ingredients. She uses it as a snack or sour cream substitute and recommends shipping supplies ahead of time.
“Fresh dairy products are sometimes difficult to find in remote sites. Boxed ultra-pasteurized and/or dried products are good alternatives.” – Becky S.
Makes: About 6–7 cups
Time: ~8 hours (mostly incubation time)
Difficulty: Moderate (requires thermometer and incubation method)
Ingredients
- 7 cups whole milk (ultra-pasteurized preferred for easier prep)
- 1 cup dry milk (optional – for thicker yogurt)
- ¼ cup dry cream or ½ cup liquid cream (optional – for a creamier texture)
- 1 packet unflavored gelatin (optional – for thicker yogurt)
- ¼ cup cold water (for softening gelatin)
- ¼ cup boiling water (to dissolve gelatin)
- 2 packets dry yogurt starter or ½ cup plain active yogurt (as starter)
Instructions
- Prepare the milk: In a saucepan, whisk together whole milk, dry milk (if using), and dry or liquid cream. Use a whisk, blender, or frother to mix thoroughly.
- Optional thickening step:
- Soften 1 packet of gelatin in ¼ cup cold water for 5 minutes.
- Add ¼ cup boiling water to dissolve. Whisk into milk mixture.
- Heat the milk:
- If using unopened ultra-pasteurized milk: heat gently to 106°F.
- If using previously opened or non-ultra-pasteurized milk: heat to 180°F, then cool to 106°F.
- Add the starter: Once milk is below 108°F, whisk in 2 packets of dry yogurt starter or ½ cup plain active yogurt.
- Incubate: Pour into a yogurt maker or glass jars with plastic lids (avoid metal). Incubate for 6–7 hours at 100–106°F using one of the following methods:
- Wrap jars in a blanket inside an insulated container
- Place on a heating pad or heated blanket
- Use the oven with just the pilot light on
- Try a commercial yogurt incubator
- Use “proof” or “yogurt” setting on an Instant Pot (water bath recommended)
- Crockpot on “keep warm” setting (check temps closely and use a water bath)
Field Notes
- Becky ships dry goods like milk powder and yogurt starter from Amazon ahead of her assignments—she recommends allowing at least three weeks for delivery.
- She packs a small yogurt-making toolkit that includes a thermometer, whisk, plastic jar lids, and dry starter, so she’s ready to ferment anywhere.
- With a little prep, she’s able to make high-quality Greek yogurt—even in remote housing setups.
- This thick, fatty yogurt can double as sour cream in many recipes—perfect for topping stews, chili, or Cabin Pie!
Trail Cooking Tips & Tricks
From bartering moose meat to meal-prepping 30 frozen dinners, here’s how our providers stay nourished—and sane—while working remote assignments.
These tips are pulled straight from the field and organized into three core categories:
Packing Provisions
What to bring, how to keep it fresh, and the best ways to travel with your meals.
Meal-Prepping Before You Fly
Cook and freeze full meals (stews, casseroles, or protein bowls) at home to bring on assignment
Some providers prep 30+ dinners and even frozen smoothies in bulk
Freeze meals flat in Ziplocks or stackable containers for easy storage
Flash-freezing or drying fresh produce helps avoid the “fruit and veg drought” in remote areas
Bonus: This way, you don’t have to cook on assignment!
Cooler Packing & Frozen Transport Tips
Use soft-sided coolers with foil insulation to maximize frozen storage
- Consider hard-sided coolers if packing in things that are soft or squishable (eggs, butter, bread, etc)
Add a large flat ice pack—keeps things cold for up to 2–3 days
Store frozen items in a hotel walk-in freezer overnight before travel (depends on your travel plans and location)
Avoid refreezing (and food poisoning)—fully freeze everything before flying out and thaw once
When the Store’s Not an Option
Some providers work off the road system, where groceries must be flown in
Stock up on canned, boxed, and dry goods for easy meals in a pinch
Pre-packed meals with stable ingredients mean fewer surprises and no missed meals
- Some locations do have restaurants to take advantage of!!
Tools to Pack
Sharp knife and sharpener
Can opener
Meat thermometer
Ice cream scoop (yes, seriously)
Optional baking tools: whisk, pastry cutter, jar lids for yogurt-making
Know Before You Go (Your AE or Ops Rep Can Help)
Ask whether a local store exists and if/when it’s open
Time your arrival day to avoid weekend store closures (this may be beyond our control)
Ask what kind of appliances are available: stove, oven, microwave, freezer?
If possible, connect with someone who’s been to the site before for insider tips
Bush Pantry Basics
Shelf-stable staples, dried goods, and seasoning stashes that go the distance.
Bring your own spices—many small stores don’t carry things like rosemary, thyme, Worcestershire, or HP Sauce
Dry ingredients like milk powder, yogurt starter, and dry cream can be shipped in advance (allow 3+ weeks for delivery!)
Providers love boxed/bagged items with minimal add-ins: brownie mixes, muffins, soup bases, MREs
Dehydrated veggies (onions, peppers, zucchini) pack small but add big flavor
Protein-rich staples include lentils, tofu, dried beans, tinned fish, foraged meats
Pack olive oil, butter, or mayo when space allows—these items are pricey or scarce locally
Shelf-stable dairy alternatives and boxed mashed potatoes can be lifesavers when fridges are unreliable
Instant broth, powdered sauces, and seasoning blends make boring food feel like a meal again
Don’t forget the coffee. Good beans (or your favorite instant) are a common splurge
Local Food & Friendly Trades
What you can’t pack, you might be gifted—or traded for.
In some villages, patients and coworkers offer fresh catch or homegrown/made goods
Locals often refuse money, but happily trade for MREs, snacks, or even spare clothing
Several providers traded clothing for fresh fish/meat – consider bringing extra!
Bartering is about mutual respect—it’s not transactional, it’s relational
Typical trades have included:
Moose
Salmon
Reindeer
- Halibut
Frozen berries (cherries, salmonberries, blueberries)
Some providers are invited to home-cooked meals or potlucks with community members (but never assume!)
Sharing food is often a bridge to trust, belonging, and real connection
Final Thoughts
Whether you’re cooking over a stovetop in staff housing or thawing a frozen stew after a long bush plane ride, one thing’s clear: food on assignment is more than just fuel—it’s comfort, creativity, and community.
We hope these recipes and real-world tips help make your next rural grocery run a little easier, your packing list a little smarter, and your time in the field a lot more flavorful.
And if you’ve got a favorite field-tested meal of your own? We’d love to feature it in a future edition of Assignment-Ready Recipes. Until then—happy cooking, and safe travels.